
Starting a personal blog often feels overwhelming. Many beginners believe they must first learn HTML, CSS, or JavaScript before publishing their first article. I thought the same, until I discovered that modern frameworks and no-code tools make it possible to create a professional blogging website without writing any code.
In this detailed guide, I’ll explain step by step how I built my blogging website without coding, the exact tools I used, and why this approach is ideal for beginners. Whether your goal is to set up a Next.js blog with Firebase or simply explore no-code website solutions, this article will give you a practical roadmap.
You can also view the complete source code here:
GitHub Repository: Ahmad Blogs
Why Build a Blog Without Coding?
While platforms like WordPress, Blogger, and Wix are widely available, I wanted something more flexible, customizable, and scalable. Using Next.js, Firebase, and Vercel, I was able to build a blogging platform that looks professional, is SEO-friendly, and will grow with me over time—all without manually writing code.
Advantages of a no-code blog setup
• Faster setup – You don’t need to spend months learning web development.
• Lower costs – Most of the tools I used have free tiers or affordable plans.
• SEO benefits – Unlike drag-and-drop website builders, a Next.js blog can be fully optimized for Google search.
• Scalability – Firebase and Vercel automatically handle traffic spikes and growth.
• Future-proofing – You can always add new features later as your audience grows.
The Technology Stack I Used
Here are the exact tools that powered my blog:
- Next.js – A React-based framework known for speed, responsiveness, and SEO optimization.
- Firebase Firestore – A real-time NoSQL database to store posts, authors, and comments.
- Canva – A design tool for creating featured images, graphics, and banners.
- Vercel – Hosting with global CDN, HTTPS, and one-click deployment.
- GitHub Copilot – An AI coding assistant that helped generate UI components when needed.
Step 1: Structuring Content with Firebase
The foundation of my blog is Firebase Firestore. I organized content into different collections, which made the site easier to scale and maintain.
- Posts – Each blog entry includes a title, body text, category, image, and publication date.
- Authors – Stores details such as name, short bio, and profile photo.
- Categories and Tags – Helps users filter content and improves SEO with relevant keywords.
- Comments – Allows readers to interact and share feedback.
This structure is flexible enough to handle both small blogs and large-scale content sites.
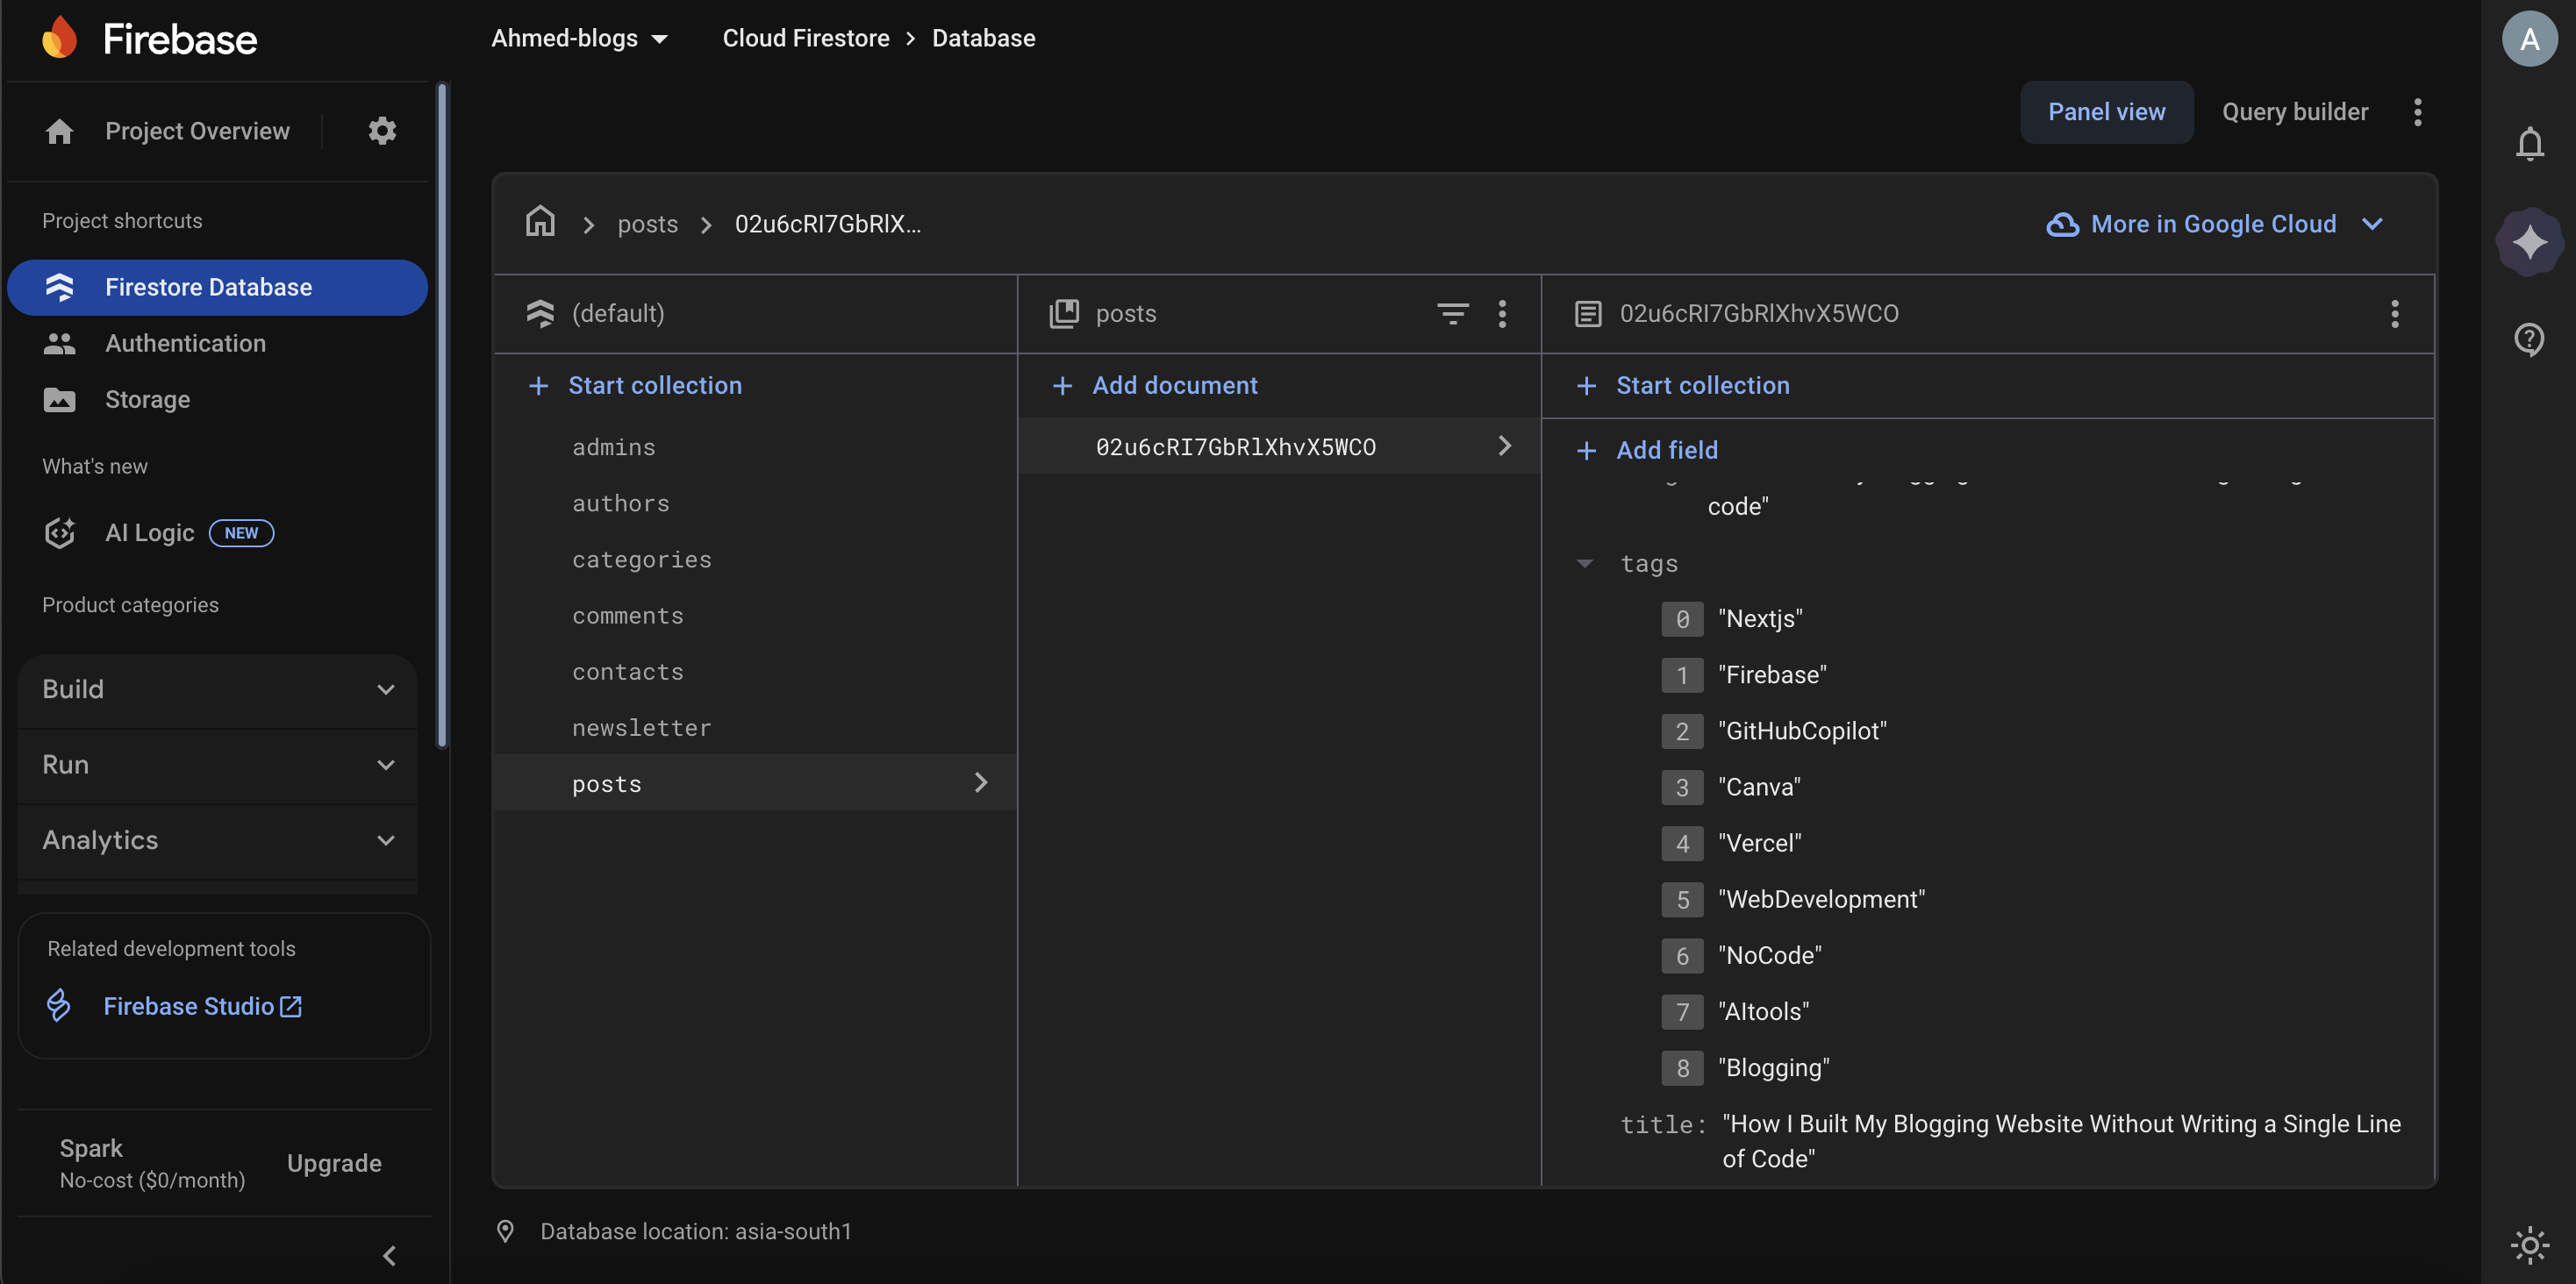
Firestore collections designed for posts, authors, and comments.
Step 2: Building the Frontend with Next.js
For the frontend, I used Next.js, which supports server-side rendering (SSR) and static site generation (SSG). These features ensure that blog pages load quickly and rank better in search engines.
Instead of writing everything from scratch, I used GitHub Copilot to generate reusable components such as:
- Blog post cards
- Author profile sections
- Category filters
- Comment forms
This combination of Next.js and AI assistance allowed me to focus more on design, user experience, and SEO.
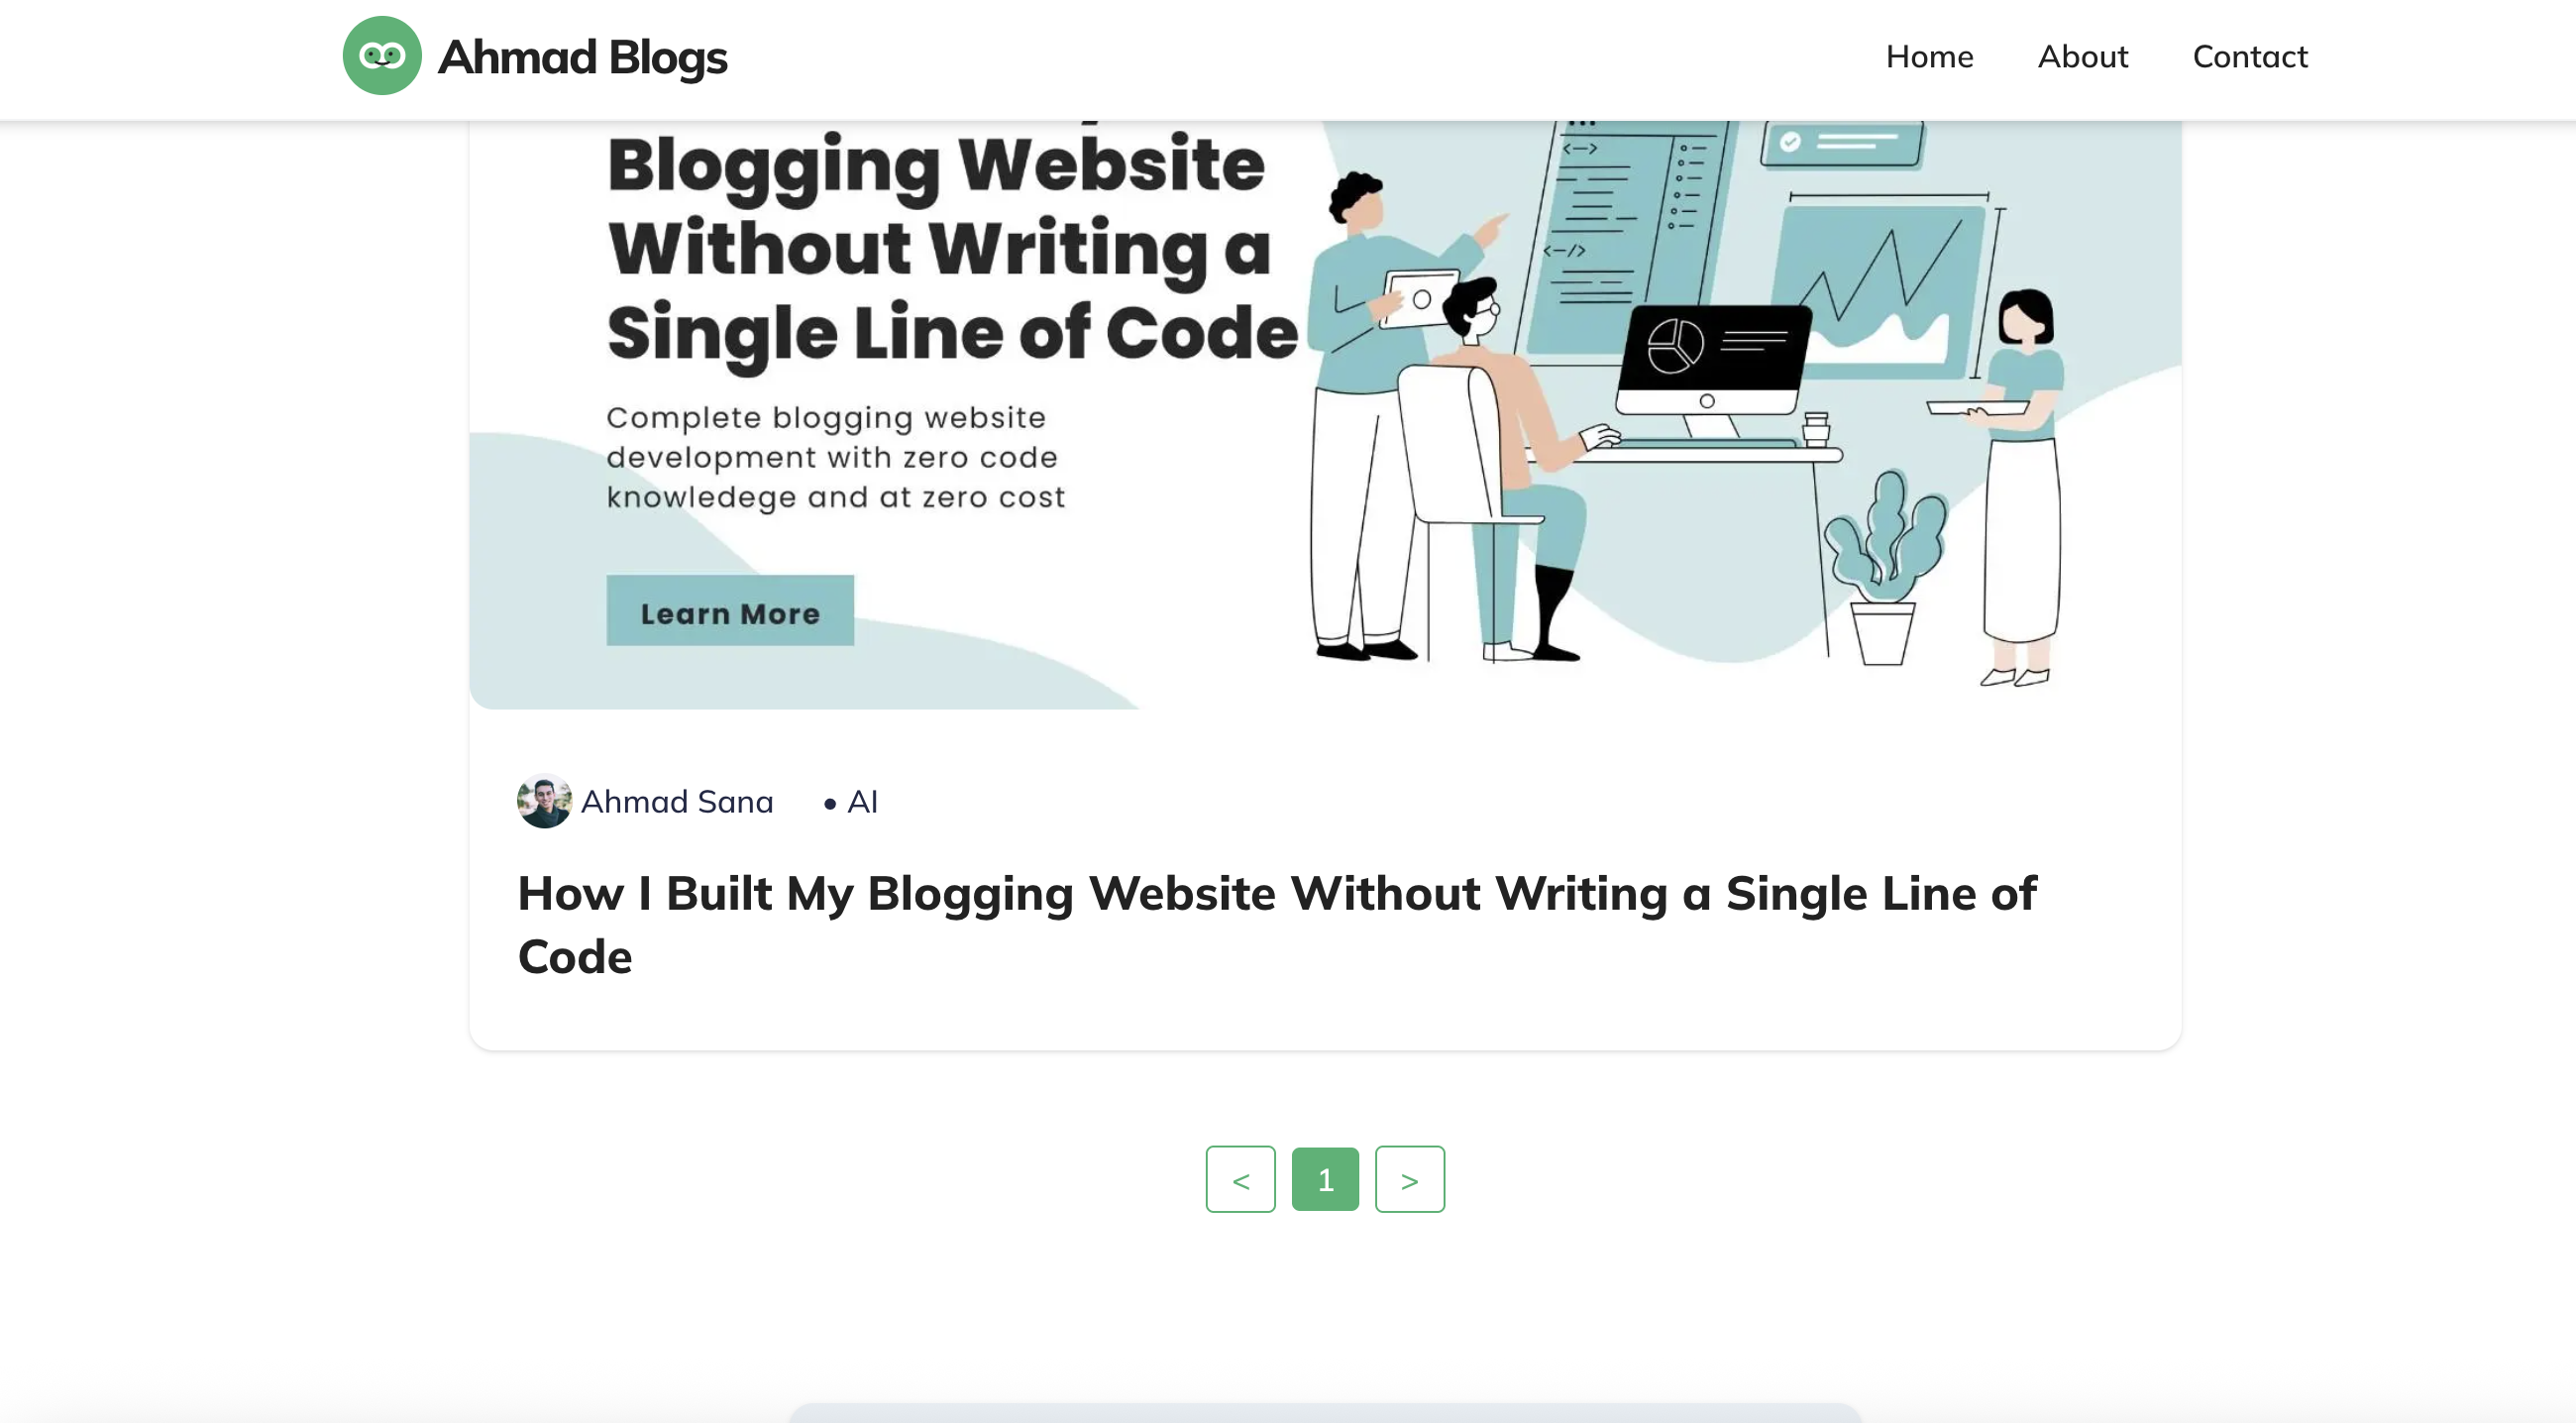
A blog post component built with Next.js and Copilot.
Step 3: Designing Visual Assets with Canva
A blog is not only about text; visuals play a crucial role in engaging readers. I used Canva to create:
- Featured images for each blog post
- Header banners for the homepage
- Social media preview images
- Custom graphics to enhance storytelling
This gave my blog a polished, professional appearance without hiring a graphic designer.
Step 4: Deploying the Blog with Vercel
Once my blog was ready, I deployed it using Vercel. The deployment process was simple and efficient, taking less than 10 minutes.
Key benefits of using Vercel:
• Automatic SSL (HTTPS) included by default
• Global CDN for faster page loading worldwide
• Seamless integration with GitHub for continuous deployment
• Automatic scaling to handle sudden increases in traffic
Now, every time I push new updates to GitHub, the blog redeploys automatically.
Step 5: Managing Content with an Admin Panel
To simplify content management, I built a custom admin panel in Next.js. Instead of manually updating Firestore, I can now:
- Add or edit blog posts quickly
- Manage categories and tags
- Update author details
- Approve or moderate comments
This admin panel works like a lightweight CMS (Content Management System) and makes ongoing content updates effortless.
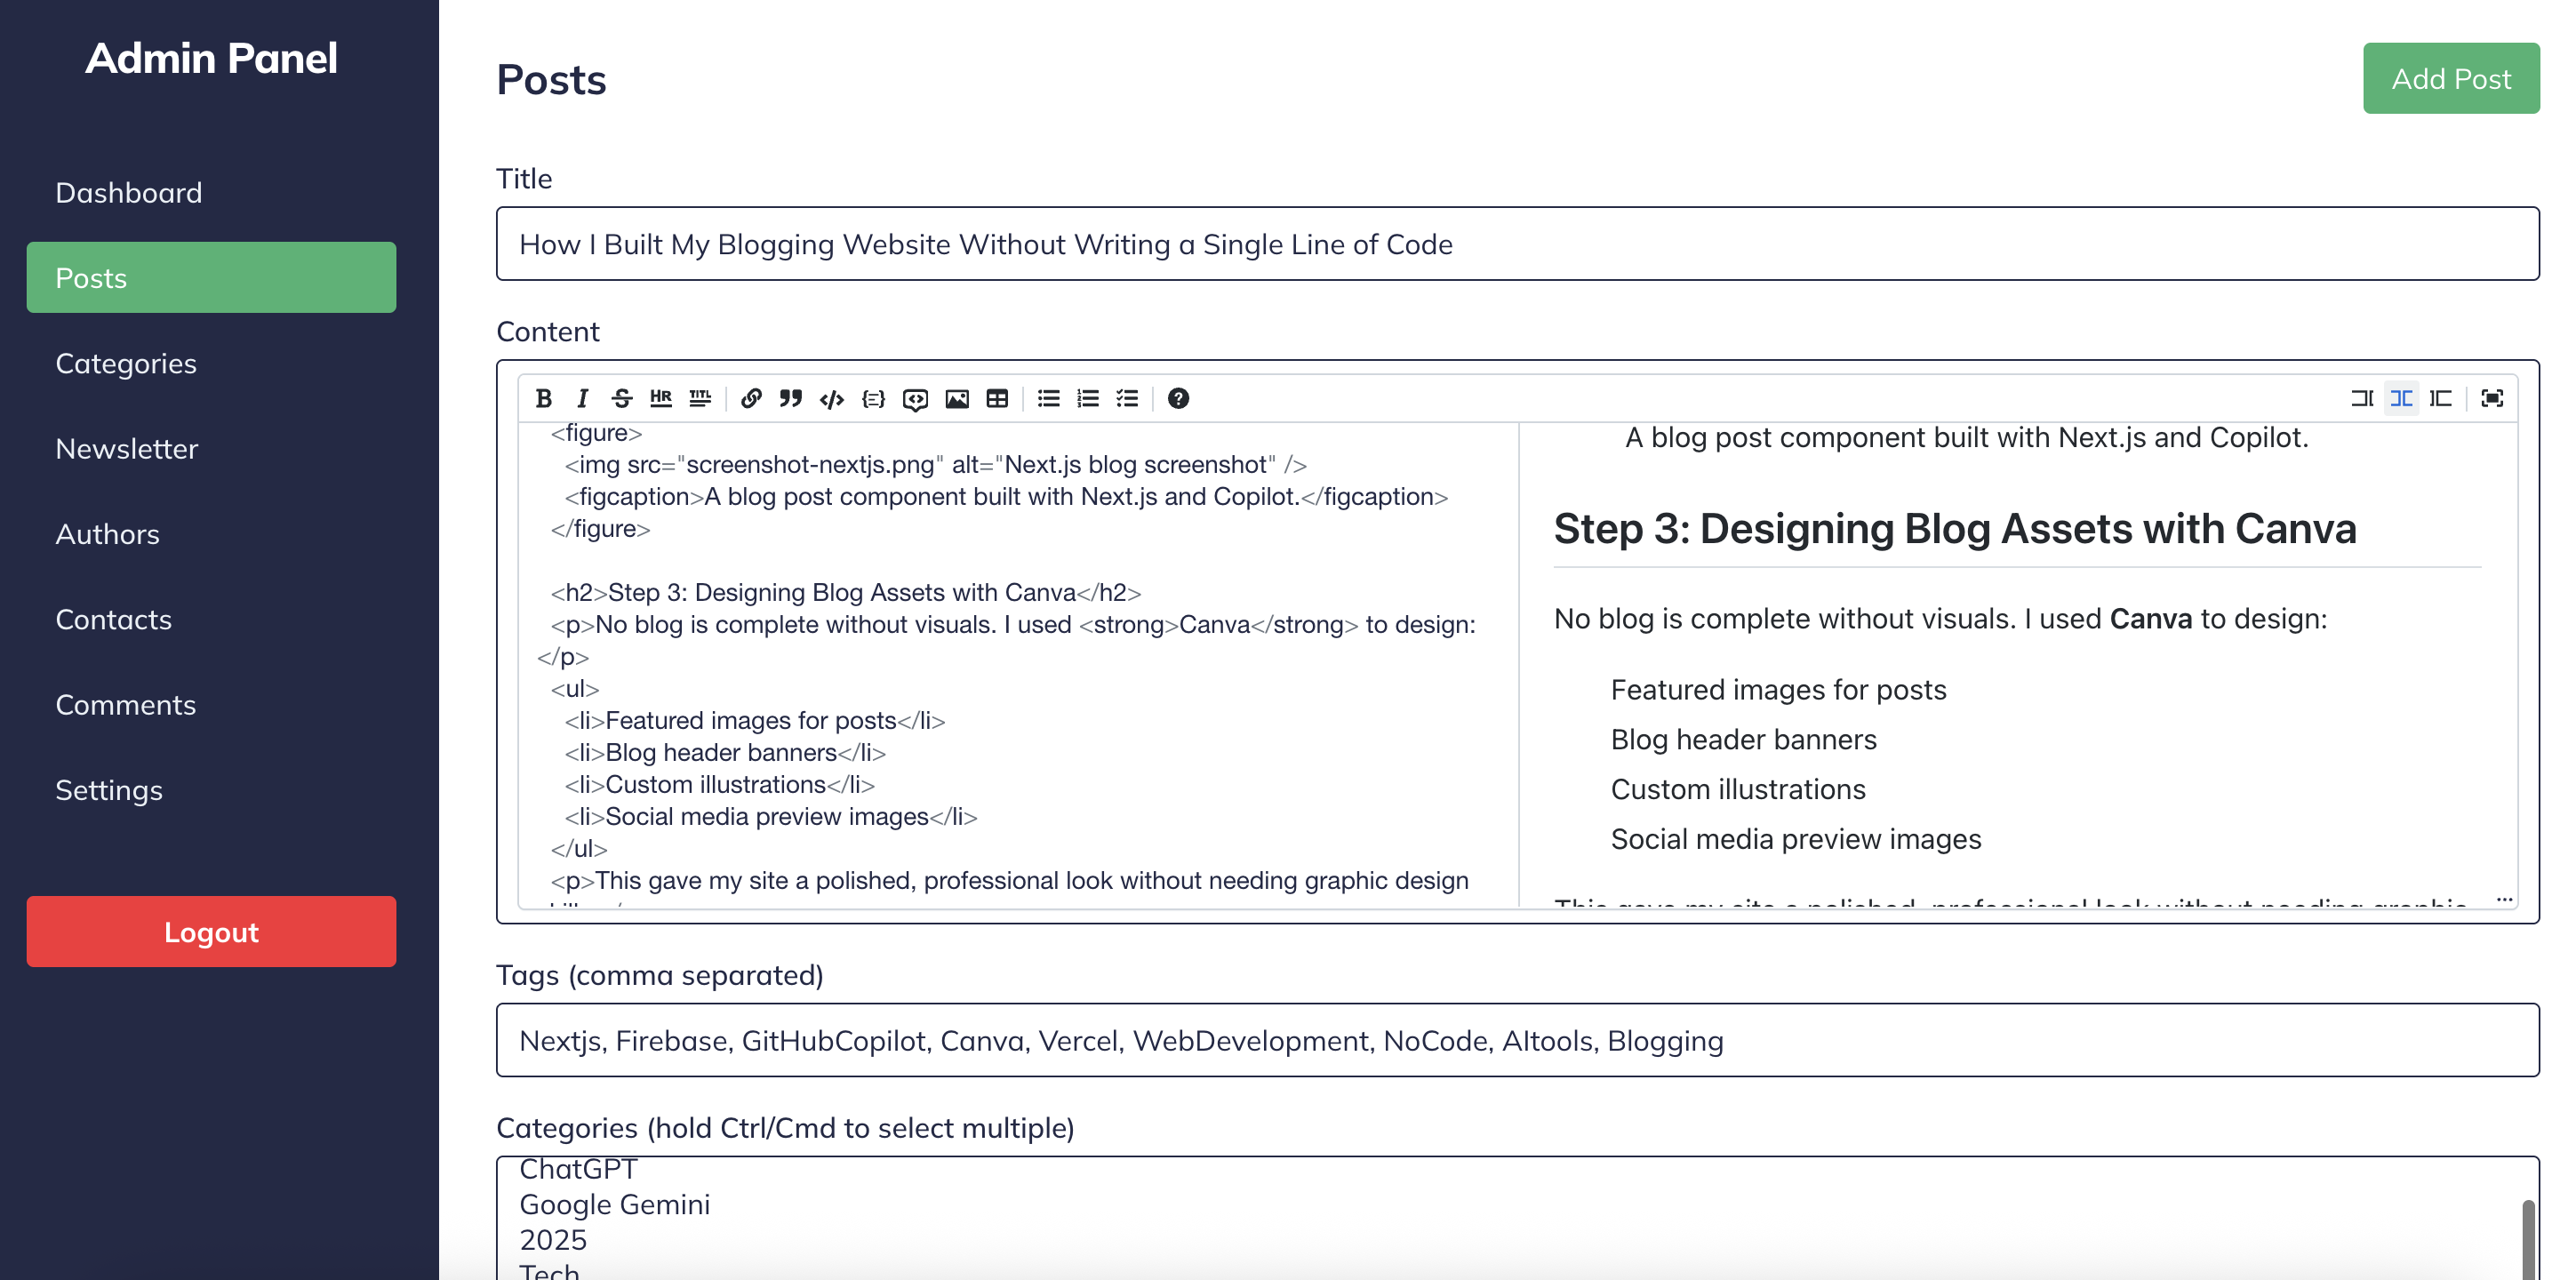
Admin panel for managing posts and authors.
Key Advantages of My Approach
After building this project, here are the biggest advantages I noticed:
- Beginner-friendly – You don’t need programming knowledge to get started.
- Cost-effective – Most services are free at entry level.
- Scalable – The blog can grow without major technical changes.
- SEO-friendly – Pages are optimized for search engine visibility.
- Future-proof – It’s easy to extend with new features later.
Final Thoughts
Creating a blogging website without coding is completely achievable today. By combining Next.js, Firebase, and Vercel, along with design tools like Canva and AI assistants like GitHub Copilot, I built a blog that looks professional, performs well, and is easy to manage. The best part is that I didn’t have to write a single line of code.
If you want to start your own blog, don’t wait until you “learn programming.” Use the modern no-code tools available, focus on writing valuable content, and launch your blog today.
You can explore the complete project here:
GitHub Repository: Ahmad Blogs

")
